Original Nestle Toll House Chocolate Chip Cookies
I remember the first time I tried to bake, it was Herbed Rolls, a kind of yeast rolls, which was in no way considered to be a good starting point for newbies. From my readings about baking, cookies are usually the first attempts at baking, as the process is "simpler."
So I searched for a recipe for making cookies. My attention was caught by the recipe title "Out-Of-This-World Oatmeal Cookie," plus it had the promise of being healthy by virtue of the oatmeal content. I followed the instructions, down to "drop by teaspoonfuls onto an ungreased cookie sheet." I ended up with tiny hard and tough crunchy cookies that everyone in the family tried and never got a second helping of. Including me. I kept the 4 dozens of cookies in jars and cans, not wanting to throw them away...until the cans and jars were all covered with dust, then I tried them again in the hope of liking them this time...but no.
I finally had the will to throw them into the trash can. And now, after probably a year after that first try with cookies, I have again gathered enough courage to try, this time, the Nestle Toll House Chocolate Chip Cookies. At first I tried making half a batch (half the recipe), so that in the event that the turn out was not that good, I would not have dozens to throw away.
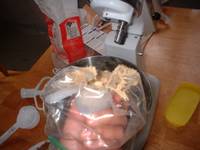
The first photos here show the ingredients for half the recipe. The photos starting from the scooping of the cookie batter to the baked finished product show my second batch of the same recipe. The first half I made were good enough but not quite good to me: they were not too small, but flat and looked so plain (no choco chips showing on top). Soft yet crunchy nonetheless. With the second batch I made some experiments in the process (I also encouraged the kids to take part), and the results were what I yearned for.
Ingredients (whole recipe, found at the back of the package of choco chip morsels):
2 1/4 cups all-purpose flour
1 tsp baking soda
1 tsp salt
1 cup (2 sticks) butter, softened (microwave for 10 seconds)
3/4 cup granulated sugar
3/4 cup packed brown sugar
1 tsp vanilla extract
2 large eggs
2 cups (12-oz pkg) Nestle Toll House Semi-Sweet Chocolate Morsels
1 cup chopped nuts (optional; I made some with nuts for myself; kids and hubby don't like nuts)
Instructions:
Preheat oven to 375 deg F.
Combine flour, baking soda and salt in small bowl.
Beat butter, granulated sugar, brown sugar and vanilla extract in large mixer bowl until creamy.
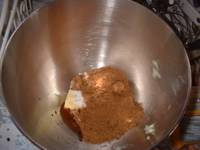
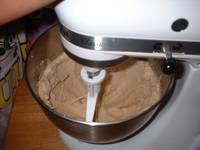
Add eggs one at a time, beating well after each addition.
Gradually beat in flour mixture, stopping from time to time to scrape the sides and bottom to ensure uniform mixing.
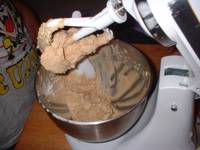
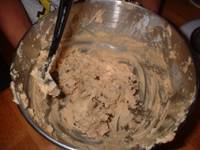
Stir in morsels and nuts, reserving about 1/2 cup of the chocolate morsels.
Where the recipe called for "dropping by rounded tablespoon, I used a plastic measuring cup lined with sandwich bag to scoop out and shape the cookie dough. If you have a cookie scoop, that will be easier to use. (Sorry na lang ako, wala pa ako nun. And it's not something I would buy when I can improvise.)
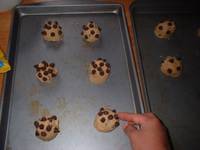
Drop the cookie batter to form a mound like so (it was a mound only a bit smaller than that of ice cream scoop, with diameter the same size as the circle made with your thumb and middle finger apposed together. And though here I used an ungreased baking pan, later I experimented using wax paper to line the pan. The advantages of wax paper will be apparent in the subsequent steps. Imagine the mounds to flatten and approximate the space it would need for the expansion. Avoid crowding the cookies on a pan.
Place the remaining chips on top of the cookie mounds as shown above. This step would result in more appealing cookies when baked.
Bake for 10-12 minutes.
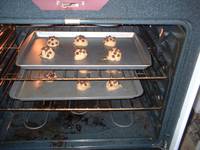

As you can see, as the mounds heat up, the butter melts and the mounds become flatter. The chips on top also become distributed.
Before the end of baking, the cookie is already flat as shown below. This results to big cookie(make a circle with your two thumbs and two middle fingers, that's the size of these cookies), which is crunchy on the underside and at the periphery while chewy at the centertop -- just the way we like it. Even my husband could not give up his last cookie for his daughter who wanted more. (Hence, the very next day I baked again, and this time making a whole batch, resulting to 22 big cookies. This is also one way that I try to establish good memories for my stepdaughter during her infrequent visits with us.)
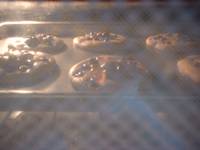
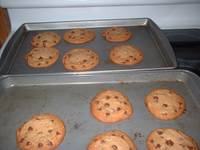
When done, allow to cook in the pan on a wire rack for 2 minutes.
Then transfer the cookies to cook completely on the wire rack for about 10 minutes.(I did this then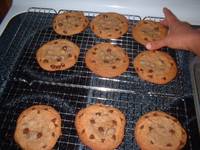 using a spatula when I had no wax paper lining. The cookies were very pliable and a bit sticky. Hence I thought of using wax paper on my subsequent tries. Not only did it solve the sticking problem, but also transferring all the cookies at once was a breeze! No hassle in cleaning the baking sheets either and no danger of scratching the finish, since I only had to clean the oil off with hot soapy water. Maybe aluminum foil will be better.) Here I held one cookie to give you an idea of how big the cookies were. One cookie is equivalent to 4 small cookies. One piece was enough for snack with a glass of milk (I can actually eat only half of it for snacks.) The kids loved it. My hubby's crazy about it. So this is now among the favorites. I am not sure if I will try other cookie recipes. We tend to stick with what we find really good.
Now because of this post I got curious to visit the Nestle Toll House website and found a webpage with step-by-step photos and a video explaining how to make it! Now is this post a complete waste of time and effort???
I Love Chocolate Chip Cookies! Surely this will be a year-round tradition to make good memories with the kids.
So I searched for a recipe for making cookies. My attention was caught by the recipe title "Out-Of-This-World Oatmeal Cookie," plus it had the promise of being healthy by virtue of the oatmeal content. I followed the instructions, down to "drop by teaspoonfuls onto an ungreased cookie sheet." I ended up with tiny hard and tough crunchy cookies that everyone in the family tried and never got a second helping of. Including me. I kept the 4 dozens of cookies in jars and cans, not wanting to throw them away...until the cans and jars were all covered with dust, then I tried them again in the hope of liking them this time...but no.
I finally had the will to throw them into the trash can. And now, after probably a year after that first try with cookies, I have again gathered enough courage to try, this time, the Nestle Toll House Chocolate Chip Cookies. At first I tried making half a batch (half the recipe), so that in the event that the turn out was not that good, I would not have dozens to throw away.
The first photos here show the ingredients for half the recipe. The photos starting from the scooping of the cookie batter to the baked finished product show my second batch of the same recipe. The first half I made were good enough but not quite good to me: they were not too small, but flat and looked so plain (no choco chips showing on top). Soft yet crunchy nonetheless. With the second batch I made some experiments in the process (I also encouraged the kids to take part), and the results were what I yearned for.
Ingredients (whole recipe, found at the back of the package of choco chip morsels):
2 1/4 cups all-purpose flour
1 tsp baking soda
1 tsp salt
1 cup (2 sticks) butter, softened (microwave for 10 seconds)
3/4 cup granulated sugar
3/4 cup packed brown sugar
1 tsp vanilla extract
2 large eggs
2 cups (12-oz pkg) Nestle Toll House Semi-Sweet Chocolate Morsels
1 cup chopped nuts (optional; I made some with nuts for myself; kids and hubby don't like nuts)
Instructions:
Preheat oven to 375 deg F.
Combine flour, baking soda and salt in small bowl.
Beat butter, granulated sugar, brown sugar and vanilla extract in large mixer bowl until creamy.


Add eggs one at a time, beating well after each addition.
Gradually beat in flour mixture, stopping from time to time to scrape the sides and bottom to ensure uniform mixing.


Stir in morsels and nuts, reserving about 1/2 cup of the chocolate morsels.
Where the recipe called for "dropping by rounded tablespoon, I used a plastic measuring cup lined with sandwich bag to scoop out and shape the cookie dough. If you have a cookie scoop, that will be easier to use. (Sorry na lang ako, wala pa ako nun. And it's not something I would buy when I can improvise.)


Drop the cookie batter to form a mound like so (it was a mound only a bit smaller than that of ice cream scoop, with diameter the same size as the circle made with your thumb and middle finger apposed together. And though here I used an ungreased baking pan, later I experimented using wax paper to line the pan. The advantages of wax paper will be apparent in the subsequent steps. Imagine the mounds to flatten and approximate the space it would need for the expansion. Avoid crowding the cookies on a pan.
Place the remaining chips on top of the cookie mounds as shown above. This step would result in more appealing cookies when baked.
Bake for 10-12 minutes.


As you can see, as the mounds heat up, the butter melts and the mounds become flatter. The chips on top also become distributed.
Before the end of baking, the cookie is already flat as shown below. This results to big cookie(make a circle with your two thumbs and two middle fingers, that's the size of these cookies), which is crunchy on the underside and at the periphery while chewy at the centertop -- just the way we like it. Even my husband could not give up his last cookie for his daughter who wanted more. (Hence, the very next day I baked again, and this time making a whole batch, resulting to 22 big cookies. This is also one way that I try to establish good memories for my stepdaughter during her infrequent visits with us.)


When done, allow to cook in the pan on a wire rack for 2 minutes.
Then transfer the cookies to cook completely on the wire rack for about 10 minutes.(I did this then
 using a spatula when I had no wax paper lining. The cookies were very pliable and a bit sticky. Hence I thought of using wax paper on my subsequent tries. Not only did it solve the sticking problem, but also transferring all the cookies at once was a breeze! No hassle in cleaning the baking sheets either and no danger of scratching the finish, since I only had to clean the oil off with hot soapy water. Maybe aluminum foil will be better.) Here I held one cookie to give you an idea of how big the cookies were. One cookie is equivalent to 4 small cookies. One piece was enough for snack with a glass of milk (I can actually eat only half of it for snacks.) The kids loved it. My hubby's crazy about it. So this is now among the favorites. I am not sure if I will try other cookie recipes. We tend to stick with what we find really good.
Now because of this post I got curious to visit the Nestle Toll House website and found a webpage with step-by-step photos and a video explaining how to make it! Now is this post a complete waste of time and effort???
I Love Chocolate Chip Cookies! Surely this will be a year-round tradition to make good memories with the kids.


Not a wasted effort at all, Manang. It's always good to hear different versions of making things. Plus, it's a good chronicle of times spent with the kids, di ba? That's why I post things that seem redundant sometimes, so the girls will have something to look back to when it comes time for them to cook in their own kitchens.
ReplyDeleteI'm sure your kids will always remember times like this. I know I do. My best times with my lola or my dad were in the kitchen, cooking.
Your cookies sure look yummy! These cookies can easily be kept in the freezer, in case you have time to make extra batches. Instead of wax paper, I use the Reynolds Release aluminum foil to line the baking sheets.
ReplyDeleteHave a happy Thanksgiving, Manang!
Hi Manang, inggit ako sa Kitchen Aid mixer mo :).
ReplyDeleteIt's good to post "basic" recipes. Not all food blog readers are experienced cooks/bakers so it's good to post these kinds. I myself was able to bake this very recipe in Phils. but since lost my copy. Thanks for posting!
JMom,
ReplyDeleteYou are so right! Bigla ko tuloy iniba ang sidebar ko to include that bit about leaving our foodblogs to the kids as a legacy, an online record of memories spent together.
MsEllaNY,
Seems like freezing will not be a problem as the cookies don't usually survive 3 days! Haha! I'll use the R Release aluminum foil next time! Thanks for that tip.
CK,
Ano ba email addy ni Mr nang mabulungan about your wishlist?...Haha...
My previous MIL used to bake brownies and cookies to offer to the kids during visits. I never learned from her though. Baka magulat sya ngayon sa mga nagagawa ko! But I still have to try baking a real cake, yung mala-Red Ribbon.
This was not a waste of time at all. I will refer to your post when I get the guts to bake my own cookies. :)
ReplyDelete