Making Pie Crust - My first attempt
Last year I wanted to try making an apple pie. But I did not know how to make the crust. I searched the website which I trusted to give the best tips on how to make one: King Arthur Flour. And I found their Favorite Pie Crust Recipe, which explained their method first before they gave their ingredients list. At first I found it too complex. So, I shook off my dream to bake a pie that year and tried another apple recipe, which I liked but my hubby found so-so (anything new to him is not that welcome. I was surprised he liked my adobo, kaldereta, and chicken curry at all!).
Now, with the recent trial in making empanada which met success at least with the group we had during a friend's birthday celebration, I gathered enough courage to give the recipe a second look and to finally try. The empanada pie crust was very similar anyway. But the method given by KAF resulted to a more pliable, yet tender and flaky crust that my hubby dubbed as "perfect" and "better than store-bought" ("Don't show that to Mom. She'd have a fit!" What a compliment.) My apple pie tasted good to my husband, but not to me nor to my kids, as we are not that used to super-tart/sweet combination in pies. So, in this post, I would share only my pie crust making, as I am still in search of pie filling recipes that will reach a compromise between my taste and my husband's (the kids like it sweeter, just as I do). Maybe the long-time Pinay expats can give me some.
Why do I want to make my own pie crust when we can buy it from the store? One thing is that I believe that making from scratch is more economical, given that I have plenty of time to experiment. Second, I like the challenge. Third, if I can come up with something better than store-bought (like my whoopie pie), then why not? Fourth, it might be a source of additional occasional income in the future if I find a market for my goods. (A note to drstel: My friend who celebrated her birthday was asking for a session in empanada, because her co-worker's family had been bugging her to teach them the recipe!) And fifth, if I can teach my kids the how-to's of such favorites, then it will be a tradition to be passed on (a good way to share quality time with the family).
Okay on to Pie Crust Making:
(I compared recipes of two-crusted pies with that of KAF, and I chose one that used both vegetable shortening and butter (like in KAF), but I replaced the shortening to leaf lard which I myself rendered, and incorporated 1 tbsp vinegar (as in KAF, but not in the recipe I used) and eliminated KAF's use of their special flour (I used regular all-purpose flour, which I had in my pantry) as well as the buttermilk powder (I did not have it; it was optional anyway.) I got the recipe from All-Recipe's website. It also had sugar (not in KAF, but I liked it so after having tried the empanada crust of drstel). Then I added a touch of eggwash (1 egg slightly beaten + 1 tbsp sugar + (optional) 1 tbsp cream or milk) like I did with the empanada.
Ingredients:
2 1/2 cups white flour
2 tbsp sugar
1/4 tsp salt
1/2 cup cold butter
5 tbsp cold leaf lard (you can use vegetable shortening if you prefer)
1 tbsp cold cider vinegar
7 tbsp (or so) ice water
Instructions:
Whisk together all of the dry ingredients, reserving a few tablespoons of the flour. Cut in the vegetable shortening, working the mixture until it’s mealy and crumbly. (I did not include photos here of the initial steps. That would be redundant. Just look at the chicken empanada recipe.)
Place the reserved flour on your work surface, and coat the butter with the flour. Use a rolling pin or the heel of your hand to flatten the butter till it’s about 1/2-inch thick. Break this flour-coated butter into 1-inch pieces, and mix it into the dough, just till it’s evenly distributed; some of the pieces of flour-coated butter should break into smaller pieces.
Sprinkle the vinegar first then the ice water (may use more than 7 tbsp) over the dough while tossing with a fork. Just as soon as the dough becomes cohesive (i.e., you can squeeze it into a ball easily), stop mixing; there should still be visible pieces of fat in the dough. Make two balls and flatten the dough balls into disks and wrap them in plastic wrap or waxed paper.
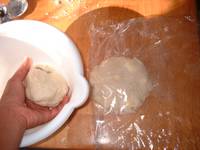
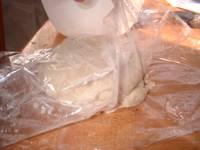
Refrigerate for 30 minutes or longer; this resting period allows the flour to absorb the water, making the dough easier to roll out.
Flour your work surface and roll the dough into a 12 x 9-inch (approximately) rectangle. If it isn’t holding together well, sprinkle it lightly with a couple of teaspoons of water. (I intermittently sprinkled lightly with flour while rolling, so it will spread out easier despite the clinginess to the plastic.)

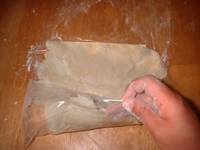
Fold the dough into thirds (like a letter),
then fold it into thirds the opposite way, to form a rough square.
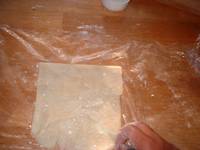
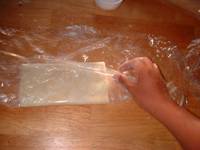
Do the same with the other disk.
Wrap them well and refrigerate again.

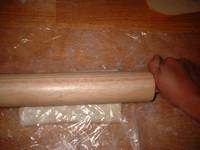
When you’re "ready to roll," remove the dough from the fridge. Dough made with a combination of butter and shortening should rest for about 5 minutes at room temperature before rolling.
Roll the dough between sheets of plastic wrap or waxed paper to the size needed (about 13 inches for a 9-inch pie). Chill in its plastic wrap or waxed paper until ready to fill.
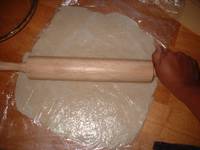
Pre-heat the oven to 425 deg F. Prepare your filling. (I chose not to post the apple pie recipe that I tried here since I did not like it. It was too sour for me, but my hubby liked the tartness that was in contrast to the sweetness of the sugar, though he admitted it was a bit too sour, and suggested that it was probably the McIntosh variety that made it so, then added that probably next time I should use the Cortland variety or use more sugar. I intend to do both next time.)
Place one dough onto the pie plate; peel off the plastic wrap (or wax paper).
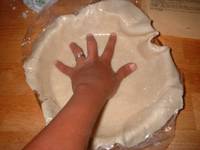
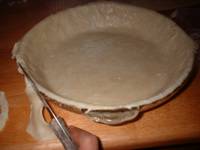
Cut the edge with a knife or the handle of a spoon.
Pour the filling into the middle; shake to distribute around.
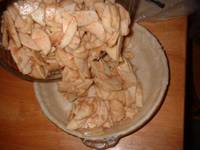
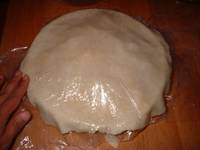
Cover with the other disk; peel off the plastic (See how easy it is to maneuver with plastic?)
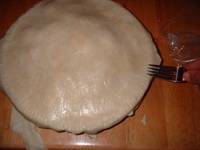
Decorate the edges by pressing with fork (or use your thumb; whatever suits you). Pressing also seals the two disk doughs together. Trim away the excess dough.
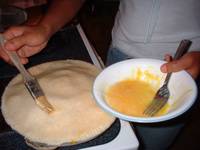
Brush the top with eggwash (I make mine the same way I do with my empanada: 1 egg slightly beaten with 1 tbsp sugar; may add a tbsp of milk or cream).
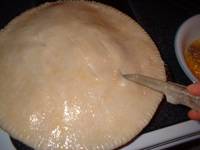
Cut several slits (you may want to decoratively slit, as in orient the slits as to create an asterisk effect. Don't copy what I did here). These will be vents for steam to escape through.
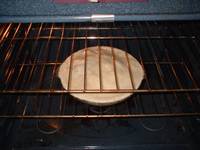
Bake in the middle shelf of the oven as instructed in the recipe you are following (mine said 40-50 minutes or until crust is brown and juice begins to bubble through slits in crust).
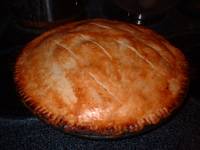
This is how it appears after baking. Bulge in the middle will disappear upon cooling down. Set on the cooling wire rack for several minutes until comfortably warm to eat.

I am not saying this is the perfect way to do it. I just followed the instructions by the authority in baking at King Arthur's website and it turned out "perfect" for my hubby, and I was satisfied with it so I am sharing this here. If you have better ways, maybe you can share yours, too.
The cut pie reminded me of longed-for BUKO (coconut) PIE. Now I wanted to ask my fellow pinay expats if there's any chance I can make coconut pie a la Laguna style even if I am here, probably with the use of dried coconut meat (if there's any) or fresh buko (where can I find one?) and if you have a recipe to share (because I really don't know how to make buko pie)? Also if you have tried and tested recipes for fillings which uses other fruits, can you share or provide links to them? I would appreciate it if I would be spared the trouble of trying, like I did with this one.
UPDATE as of January 15, 2005.
This update is a result of correspondence with isabelo.
What I do now with my pie crust recipe is I use pork lard (I have a post on that, too) while I have it, in place of the vegetable shortening. Malapit na maubos ngayon, haha!
Then while you are rolling, once in a while you peel off the plastic and sprinkle some more flour on top of the dough, then place the plastic and roll again. This way, while you flatten the bits of butter/shortening/lard, you also have a thin layer of flour above them, so that when you finally bake them, they are formed as flaky sheets. I realized that this pie crust recipe can also be used for empanadas. So when I make a pie and have extra crust that I cut off from the overhang, I form it into balls for empanada making. I place in airtight bag until I am ready to make the empanadas, either making another batch of pie crust recipe, or using leftover doughs from making pies. Don't let them openly exposed in the fridge or they will dry up and will be brittle -- hard to roll.
When I make empanadas, I have a sheet of baking pan inside the fridge, ready to receive the empanadas as I make them, this way the butter does not melt, so that when I am ready to bake them and brush the eggwash on top, it will be "dry" (the butter won't get incorporated/dissolved in the eggwash).
I have also been freezing some of the extra empanadas, kept airtight in ziploc bags. When I want to bake only 3-4 pcs (one for me and my boys for merienda purposes), I use the oven toaster (I asked that from hubby last Christmas; I saw one big enough for just $12 at Sear's), set at 400 deg F for 15 minutes or until I see the crust's butter bubbling and crust gets golden brown. Then I lower the heat to 325 and bake to further heat the innermost filling for about 5 minutes more. Instant and saves energy!
Now, with the recent trial in making empanada which met success at least with the group we had during a friend's birthday celebration, I gathered enough courage to give the recipe a second look and to finally try. The empanada pie crust was very similar anyway. But the method given by KAF resulted to a more pliable, yet tender and flaky crust that my hubby dubbed as "perfect" and "better than store-bought" ("Don't show that to Mom. She'd have a fit!" What a compliment.) My apple pie tasted good to my husband, but not to me nor to my kids, as we are not that used to super-tart/sweet combination in pies. So, in this post, I would share only my pie crust making, as I am still in search of pie filling recipes that will reach a compromise between my taste and my husband's (the kids like it sweeter, just as I do). Maybe the long-time Pinay expats can give me some.
Why do I want to make my own pie crust when we can buy it from the store? One thing is that I believe that making from scratch is more economical, given that I have plenty of time to experiment. Second, I like the challenge. Third, if I can come up with something better than store-bought (like my whoopie pie), then why not? Fourth, it might be a source of additional occasional income in the future if I find a market for my goods. (A note to drstel: My friend who celebrated her birthday was asking for a session in empanada, because her co-worker's family had been bugging her to teach them the recipe!) And fifth, if I can teach my kids the how-to's of such favorites, then it will be a tradition to be passed on (a good way to share quality time with the family).
Okay on to Pie Crust Making:
(I compared recipes of two-crusted pies with that of KAF, and I chose one that used both vegetable shortening and butter (like in KAF), but I replaced the shortening to leaf lard which I myself rendered, and incorporated 1 tbsp vinegar (as in KAF, but not in the recipe I used) and eliminated KAF's use of their special flour (I used regular all-purpose flour, which I had in my pantry) as well as the buttermilk powder (I did not have it; it was optional anyway.) I got the recipe from All-Recipe's website. It also had sugar (not in KAF, but I liked it so after having tried the empanada crust of drstel). Then I added a touch of eggwash (1 egg slightly beaten + 1 tbsp sugar + (optional) 1 tbsp cream or milk) like I did with the empanada.
Ingredients:
2 1/2 cups white flour
2 tbsp sugar
1/4 tsp salt
1/2 cup cold butter
5 tbsp cold leaf lard (you can use vegetable shortening if you prefer)
1 tbsp cold cider vinegar
7 tbsp (or so) ice water
Instructions:
Whisk together all of the dry ingredients, reserving a few tablespoons of the flour. Cut in the vegetable shortening, working the mixture until it’s mealy and crumbly. (I did not include photos here of the initial steps. That would be redundant. Just look at the chicken empanada recipe.)
Place the reserved flour on your work surface, and coat the butter with the flour. Use a rolling pin or the heel of your hand to flatten the butter till it’s about 1/2-inch thick. Break this flour-coated butter into 1-inch pieces, and mix it into the dough, just till it’s evenly distributed; some of the pieces of flour-coated butter should break into smaller pieces.
Sprinkle the vinegar first then the ice water (may use more than 7 tbsp) over the dough while tossing with a fork. Just as soon as the dough becomes cohesive (i.e., you can squeeze it into a ball easily), stop mixing; there should still be visible pieces of fat in the dough. Make two balls and flatten the dough balls into disks and wrap them in plastic wrap or waxed paper.


Refrigerate for 30 minutes or longer; this resting period allows the flour to absorb the water, making the dough easier to roll out.
Flour your work surface and roll the dough into a 12 x 9-inch (approximately) rectangle. If it isn’t holding together well, sprinkle it lightly with a couple of teaspoons of water. (I intermittently sprinkled lightly with flour while rolling, so it will spread out easier despite the clinginess to the plastic.)


Fold the dough into thirds (like a letter),
then fold it into thirds the opposite way, to form a rough square.


Do the same with the other disk.
Wrap them well and refrigerate again.


When you’re "ready to roll," remove the dough from the fridge. Dough made with a combination of butter and shortening should rest for about 5 minutes at room temperature before rolling.
Roll the dough between sheets of plastic wrap or waxed paper to the size needed (about 13 inches for a 9-inch pie). Chill in its plastic wrap or waxed paper until ready to fill.

Pre-heat the oven to 425 deg F. Prepare your filling. (I chose not to post the apple pie recipe that I tried here since I did not like it. It was too sour for me, but my hubby liked the tartness that was in contrast to the sweetness of the sugar, though he admitted it was a bit too sour, and suggested that it was probably the McIntosh variety that made it so, then added that probably next time I should use the Cortland variety or use more sugar. I intend to do both next time.)
Place one dough onto the pie plate; peel off the plastic wrap (or wax paper).


Cut the edge with a knife or the handle of a spoon.
Pour the filling into the middle; shake to distribute around.


Cover with the other disk; peel off the plastic (See how easy it is to maneuver with plastic?)
Decorate the edges by pressing with fork (or use your thumb; whatever suits you). Pressing also seals the two disk doughs together. Trim away the excess dough.


Brush the top with eggwash (I make mine the same way I do with my empanada: 1 egg slightly beaten with 1 tbsp sugar; may add a tbsp of milk or cream).
Cut several slits (you may want to decoratively slit, as in orient the slits as to create an asterisk effect. Don't copy what I did here). These will be vents for steam to escape through.


Bake in the middle shelf of the oven as instructed in the recipe you are following (mine said 40-50 minutes or until crust is brown and juice begins to bubble through slits in crust).
This is how it appears after baking. Bulge in the middle will disappear upon cooling down. Set on the cooling wire rack for several minutes until comfortably warm to eat.


I am not saying this is the perfect way to do it. I just followed the instructions by the authority in baking at King Arthur's website and it turned out "perfect" for my hubby, and I was satisfied with it so I am sharing this here. If you have better ways, maybe you can share yours, too.
The cut pie reminded me of longed-for BUKO (coconut) PIE. Now I wanted to ask my fellow pinay expats if there's any chance I can make coconut pie a la Laguna style even if I am here, probably with the use of dried coconut meat (if there's any) or fresh buko (where can I find one?) and if you have a recipe to share (because I really don't know how to make buko pie)? Also if you have tried and tested recipes for fillings which uses other fruits, can you share or provide links to them? I would appreciate it if I would be spared the trouble of trying, like I did with this one.

UPDATE as of January 15, 2005.
This update is a result of correspondence with isabelo.
What I do now with my pie crust recipe is I use pork lard (I have a post on that, too) while I have it, in place of the vegetable shortening. Malapit na maubos ngayon, haha!
Then while you are rolling, once in a while you peel off the plastic and sprinkle some more flour on top of the dough, then place the plastic and roll again. This way, while you flatten the bits of butter/shortening/lard, you also have a thin layer of flour above them, so that when you finally bake them, they are formed as flaky sheets. I realized that this pie crust recipe can also be used for empanadas. So when I make a pie and have extra crust that I cut off from the overhang, I form it into balls for empanada making. I place in airtight bag until I am ready to make the empanadas, either making another batch of pie crust recipe, or using leftover doughs from making pies. Don't let them openly exposed in the fridge or they will dry up and will be brittle -- hard to roll.
When I make empanadas, I have a sheet of baking pan inside the fridge, ready to receive the empanadas as I make them, this way the butter does not melt, so that when I am ready to bake them and brush the eggwash on top, it will be "dry" (the butter won't get incorporated/dissolved in the eggwash).
I have also been freezing some of the extra empanadas, kept airtight in ziploc bags. When I want to bake only 3-4 pcs (one for me and my boys for merienda purposes), I use the oven toaster (I asked that from hubby last Christmas; I saw one big enough for just $12 at Sear's), set at 400 deg F for 15 minutes or until I see the crust's butter bubbling and crust gets golden brown. Then I lower the heat to 325 and bake to further heat the innermost filling for about 5 minutes more. Instant and saves energy!


Sinubukan kong gawin yong empanada but it turned out to be sticky the pastry. The filling was good. That was my first time to make that. I was hoping you will give me tips on how to make the pastry.
ReplyDeleteYeah, it was really sticky. I got the same experience when i made my calzone, that it was so hard to maneuver after rolling it on the table without plastic then lefting it to cover the filling then lifting again to put on the baking pan. That was where I first came upon the idea of using plastic (trial only) and it worked wonders. So now with the empanada crust and pie crust, one thing that helped me handle the pastry was to sprinkle it with flour intermittently while rolling, and the rest of the dough is still in the fridge to keep it chilled (I only get a ball-sized pinch of dough one at a time as I rolled.) Another is the use of the plastic wrapper to fold the dough over the filling and use it to press on both sides before fluting. Before I flute, I dust the dough again with flour.
ReplyDeleteManang, thanks for sharing your recipe.
ReplyDeleteI also do experiments when cooking due to inavailability of some ingredients and it's nice to come across a page like yours to learn other stuffs.
I hope you don't mind me coming back and may I link your page? please let me know :-)
Hi Thess!
ReplyDeleteWelcome! Of course you may come back here anytime and you may link me (I checked your blogger profile and got lost as to how I can link you too!). Maybe you would like to join us in the Westernized Kusina. I am sure you have your own experiences and tips and frustrations to share. Haha!
Hi Manang and anonymous! I hope some of my tips for flaky pastry will help your crust get unsticky.
ReplyDeleteKeeping butter and flour cold is important. If you can, use a cold surface like granite or marble. The recipe usually calls for a minimum and maximum of ice water (water in ice cubes) so try to go for the minimum, adding a little at a time only until you get it to form a ball.
Minimal handling is key also for having a nice flaky crust. Maybe flouring your hands first instead of adding to the dough would help. Work quickly and chill and rest the dough before rolling out to get the butter firm and something not to form, gluten? so it won't get tough. (fr an amateur!)
manang here is my FLAKY PIE PASTRY recipe:
ReplyDelete2 cups all-purpose flour
1/2 teaspoon salt
2/3 cup vegetable shortening, chilled ( i don't even chill it. butter flavored one is very good).
7 to 8 tablespoons cold water
stir together flour and salt. cut in shortening until mixture resembles coarse crumbs. sprinkle with 7 tablespoons water. stir until mixture forms a ball and leaves side of bowl. add more water if needed. turn out dough onto lightly foured surface. knead 10-15 mins. (i don't knead that long). makes pastry for 1 9-inch double crust pie.(TIP: i used this pie crust also for my baked empanada. brush the empanada with eggwash, a combination of eggyolk + 1 tablespoon water).
PERFECT APPLE PIE (the one that i used)
7-8 cups thinly sliced peeled baking apples
2 tablespoons lemon juice
1 cup sugar
1/4 cup all-purpose flour
1 teaspoon ground cinnamon
1/4 teaspoon salt
1/8 teaspoon ground nutmeg
2 tablespoons butter or margarine
1 eggyolk
1 tablespoon water
toss apples with lemon juice. combine sugar, flour, cinnamon, salt and nutmeg; add to apples and toss. pour into crust; dot with butter. roll out remaining pastry to fit top of pie crust; cut slits on top. beat egg yolk and water; brush over pastry. bake at 425 degrees for 15 mins. reduce heat to 350 degrees bake 40-45 mins. or until crust is golden and filling is bubbly. (TIP: i microwave my thinly sliced apples first, so it will not be bulging or bulky).
Hi Anonymous (wish I knew at least your username!)
ReplyDeleteThanks for those tips! They were so timely because right now I am currently reviewing recipes for apple pie. (I made my pie crust last night, waiting now in the fridge for the filling). I will try your recipe plus your method, then I will probably add 1/8 tsp cardamom as per suggested by another foodblogger.
I really love this way of exchanging tips and ideas. i thank you all for making life easier for me.
Hi Manang,
ReplyDeleteI wanted to tell you... I've been making pie crust for a while and it never occurred to me to use plastic for rolling and maneuvering it. I tried it after reading your post and it worked like a dream. Thank you! See how your enthusiasm teaches?
Fanatic