Fermentation: Sauerkraut (Fermented Green Cabbage)
 |
| I enjoy eating sauerkraut by the bowlfuls as a snack |
I first got a taste of sauerkraut last year when my SIL gave me some when we were visiting them. Although sauerkraut is most associated with Germans, evidence points that it originated in China. At first I was not that receptive of the taste. At a later date, my SIL gave me a pint for home use. That was the second time I tasted it (out of courtesy), and for some reason, I got hooked. I finished the whole pint in one sitting! Especially when I thought of sprinkling some vinegar made hot with peppers. I found myself wanting to buy from her. The problem is, she processes her sauerkraut for selling (per USDA requirement). I want the probiotics in the sauerkraut, aside from the great taste. So I resolved to make my own during this year's summer. My MIL grew seedlings of cabbage in the greenhouse for that purpose. I initially had 10 cabbages, then from the second batch of her seedlings, I had 20 more cabbages. The first cabbages were meant for experimentation stage for me.
 |
| Cabbages |
Of course before I dove into making my own sauerkraut, I read and read books and online sources on the how-to's. So I learned quite a lot about fermenting. Too bad I was not able to apply the principles and the most appropriate methods when I made my burong mangga. I did not have the proper equipment then. But before I made sauerkraut, I made sure I had the proper equipment, for small-scale initially, then when I finally had success, hubby bought me a bigger one.
As I enumerated in my burong mangga post ~~
The basic rules I have for fermenting are: (1) ferment within 24 hours of picking or as soon as possible as the LAB will be maximized that way; (2) Add sea salt at 2% by weight (for watery veggies like cabbage; or to add per liter of filtered well water -- no chlorine); (3) keep it anaerobic and do not let air in for at least two weeks to give the LAB a headstart without contamination; (4) submerge the produce in brine away from air; and (5) leave enough air space for expansion as the ferment produce more bubbles and thereby expand.
The ingredients are fairly basic. Because I had been fermenting several types of vegetables, I keep in mind a simple ingredients rule: The brine or salt ratio should be 2% to 3% by weight. Meaning, if I shred or cut in thin strips a fairly watery vegetable like cabbage or cucumbers, I measure 20 to 30 grams of sea salt per kilogram of the vegetable. For non-watery vegetable (or green mangoes), I use a brine made up of same amount of salt in 1L of filtered water. For simplicity, I just measure out 1 tbsp of sea salt.
My First Experimentation:
I made two half-gallon jars. Not quite successful because I over packed the jars.
What I learned:
1. Cabbage has enough water to make its own brine. Just let the shredded cabbage sit for a while after sprinkling with salt, then pack a little at a time and stomp good to let more juice out.
2. The container should only be filled about 3/4 of the way up, to allow for expansion once bubbles are formed during active fermentation. In my first experiment using half-gallon jars, I filled up to the neck. There was not enough space for expansion. By the second and third day, the bubbles have pushed the brine out. I had to use a bowl to keep catching the brine as they escaped the jar. Then once the active fermentation has slowed down, the ferment tended to shrink again, and with not enough brine to cover, the top most dried out and looked brownish.
3. To make sure the ferment does not dry out, weigh it down. A heavy duty ziploc bag with 2% brine can be used, or small jars that would fit.
4. Any vegetable that floats on top of the brine tends to grow whitish scum or mold, which is harmless, but results to mushy vegetable. This can happen even with a weight on and can be wiped off after the first 3 days of active fermentation. Then the weight should be replaced with a new bag+brine, the ferment covered and allowed to continue fermenting under anaerobic condition. By this time, the ferment has produced enough LAB to dominate the mini-ecosystem, and there will be less chance of developing molds/scum on top.
After the experimentation stage, I made more in the half-gallon jars, this time filling only up to 3/4 full and using ziploc bag with brine as weight. The outcome was perfect. Then I was ready for the larger-scale. Hubby bought me a 20-L capacity fermenting crock.
Further lessons learned:
1. Use the large outer leaves to cover the shredded cabbage (minimizes floaties)before placing the weights.
2. Grate the core of the cabbage and include in the ferment. It is rich in sugars that the LAB can thrive on (can't remember where I read this). An observation that I made was that the juice of the batch where I used the core was so much sweeter! But maybe because I also jumpstarted that last batch with pre-formed sauerkraut juice from a prior batch that I had in the fridge. Sauerkraut juice is so good I can drink it! It is, as a matter of fact, commercially available in Germany.
My co-worker of German descent asked me if I would consider selling a pint to him. I said no, that I use an average of one pint per week, and my store is only good for this winter. But what I did not tell him was that I was planning on giving one pint jar to him on Christmas. I have other health-conscious (or just plain real food lovers) coworkers who always look forward to me sharing my sauerkraut when I go to work.
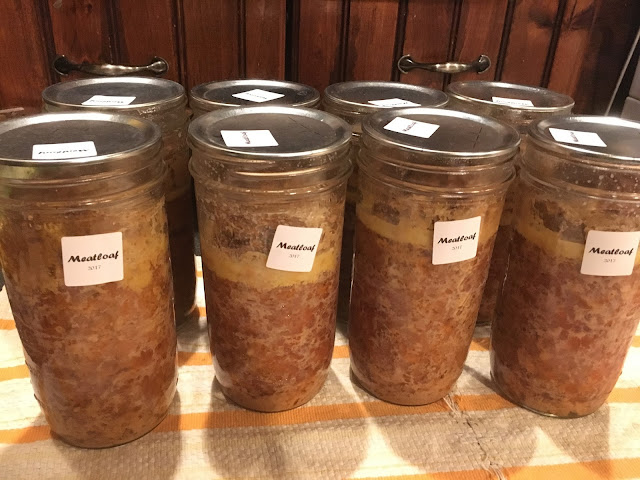
I had one last half-gallon batch that I experimented on by adding 2 bay leaves, 10 peppercorns, 2 garlic cloves, and sliced carrots. And I am enjoying it now as I write this time-consuming blog post that I don't even know if anyone will find useful. I know I will when I have to make more next summer.
 |
| Sauerkraut enriched with carrots, pepper, garlic and bay leaves |

I love sauerkraut! Ang tyaga mo Doc! I make kielbasa and sauerkraut but I would find myself spooning the leftover sauerkraut from the jar. Maybe someday I will find the patience to make from scratch.
ReplyDeleteKK, it's easy! If you have access to farmer's market you can get your cabbage from there. And then you gotta have the patience to wait 4 weeks. :P
DeleteHi Madam! do you sell home made sauerkraut? ive been looking around the web and cant find any... :(
ReplyDeleteSorry, ML...A lot of my co-workers also ask if I do, but I can't. I don't think I have enough to last me til summer. I only share here to encourage others to make them from scratch, because you can't get them this good if bought from the grocery stores.
DeleteHi Miss,
ReplyDeletePede ba gawin ito dito sa Manila na may average temperature na 28 degree centigrade?
Salamat
Doc, can you ferment sauerkraut despite the hot weather in the Philippines? Or do you keep the jar in the refrigerator?
ReplyDelete